Step 1. Prepare your floor
Before your start laying your tiles, make sure that your floor is clean and dry. When you are tiling always try to avoid making small cuts in the tiles and in wet areas like your bathroom and laundry make sure you keep the fall, so that the water drains away.
Step 2. Measure and mark your datum line
Use your spirit level, tape measure and pencil to mark out your datum line. This is your point of reference for laying the tiles, so that they are straight and symmetrical. In this instance, the datum line allows for a full tile either side of the line, and then for tiles that are the same width at the edges of the area being tiled.
Step 3. Mix up the adhesive for your tiles
Start with an empty bucket, pour in some water and add the powdered adhesive. Mix it until it is the same consistency as toothpaste. If it is too runny, add more adhesive, if it is too thick add more water.
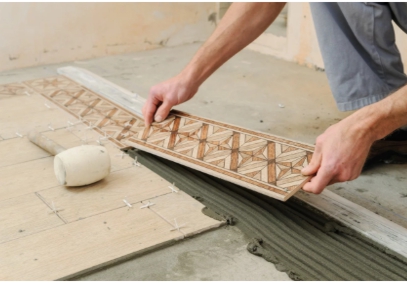
Step 4. Dry laying your tiles
It’s a good idea to lay out some tiles dry, to see what the finished floor will look like. Before applying the adhesive, lay out the tiles on the floor using your datum line as a reference. Check that they are evenly spaced on every side of the wall. If they’re not, you will need to adjust your datum line.
Step 5. Lay the tiles
Use your trowel to apply the adhesive between the datum line and the nearest wall. Run your notch trowel through the adhesive to increase the surface area of the adhesive that will stick to the tile. Then apply a small amount of adhesive on the bottom edge of the tile that runs along the datum line. Place the first tile in the adhesive and gently press it down to make it flush with the datum line.
Step 6. Insert the tile spacers
After laying a row of tiles, insert tile spacers between them. They will help keep the grout lines straight and create a professional looking result. Use two spacers for each side of a large tile. Insert spacers between all of the tiles you lay. Once the adhesive is dry, you can easily remove the spacers using needle nose pliers.
Step 7. Cut your tiles to size
Measure the distance between the laid tile and the wall at both ends of the tile, to make sure that it is square to the wall. Mark this distance on both sides of a new tile and draw a line between them. Place the tile in the cutter and run the blade along the line. Press down to break the tile along the line and lay it in the adhesive. Repeat this process when measuring and cutting all of your tiles. If you plan to tile the wall, leave a small gap between the wall and the tile on the floor.
Step 8. Cut your tile for drainage
In this case we need to cut a square in the tile for drainage. To do this, lay the edge of the tile you need to cut against the one that is laid next to the drainage hole. Mark on the tile along one edge the length of the drain. Then turn the tile on its side, hold it against the tile above and mark the width of the drain. Draw lines across the tile to mark the length and width of the drainage hole. Now in a well-ventilated area, use your angle grinder to cut out the square for the drain. Once you have cut the outline of the drain, cut a diagonal line across the square to make it easier to push the off-cut out. Lay the cut tile over the drainage hole.
Step 9. Finish laying the tiles
Continue marking, cutting and laying tiles to fill the floor space. Use a straight edge or level to make sure all the tiles are lying flat or have the necessary fall to let water drain away. If any tiles are above or below the level of ones next to them, remove them and either add or take away adhesive to make them level. Use a damp sponge to wipe off any excess adhesive that may rise up between the tiles when you press them down.